Showing posts with label Tutorial. Show all posts

Friday, July 1, 2011

Pocket Wallet Tutorial

I always think about doing tutorials but I rarely do. There are a few reasons; first they are a bit tedious with all the photos and explanations and second I tend to just do things. I rarely worry about exact measurements, I usually eye-ball things, and I upcycle so I use the materials I have laying around and I make it work.

Excuses, excuses... If you decide to give this tutorial a go and you run into any problems or something I've written doesn't make sense, please leave a comment below or shoot me an email at ashvantol@gmail.com.

Pocket Wallet
Good luck, enjoy, and please report back with your experience!

Materials and Measurements
Materials: 
  • Zipper, a 4" zip would be the perfect size. I don't have any of those laying around so I used larger zips and trim them to size.
  • Snap, make sure you have all 4 pieces to assemble the snap. I use a hammer and a wooden spool of thread for the actual assembly. 
  • Fabric, You can use as many or as few different fabrics as you like. Here I used 2, a patterned and a solid. All up you will need less than a 1/4 yard of fabric.
  • Thick Interfacing, I use Pellon 1-sided fusible, Ultra Firm Fusible Stabilizer. You can get this at Joann Fabric. You only need a tiny piece, 4" x 2.75".
  • Thread, anything will work. 
My 3 Feet
Obviously you need, scissors, a sewing machine and some feet. I use three different feet for this project. A regular foot and a zipper foot would be sufficient. Sorry, I have no idea what the third foot I use is called but I really like it and I highly recommend getting one! It is really great for stitching close to the edge of your projects. 

You will also need an iron and ironing board. I find a chopstick and piece of yarn very helpful too.

So first things first, you are going to cut out your interfacing and your fabric. The most important piece as far as getting the size and shape of your wallet right is the interfacing. Nothing else has to be cut perfectly, as long as the interfacing is cut right your wallet will have good form and shape. 

Here are the measurements to cut as they are shown above. If you love math or you are a perfectionist, you could probably work these out to more exact measurements. Math and I don't get along so well. Perfectionism and I have an understanding, as long as the end result is perfect the details can be a bit messy.

Interfacing - 4" x 2.75"
Snap Tab - 2" x 5" (generous 2 x 3 would be plenty)
Background Pieces - (cut 2) 5" x 4" 
Snap Side Pockets - cut 1 that is 9" x 4" and one that is 8" x 4". These are generous lengths that I trim later. Like I said I'm not into being exact when I sew. 
Lower Part of Zip Pocket - 5" x 8" again, this is generous in length.
Upper Part of Zip Pocket - 3" x 5"

Step 1
Step 1- Iron the interfacing to the center back of one of the background pieces. (See image right)

Step 2- Iron all the pocket pieces and the tab in half. I'm sure you are all smart enough to figure out which way to fold the pieces to end up with a wallet that will be roughly 4 inches by 3 inches when you are done. 

Step 3- Stitch the tops of the 2 snap side pockets. I do this about 1/8 inch down from the fold. This stitch adds stability and looks nice. 

Step 4- Line the pockets up on the front of the background piece with the stiff interfacing. I eyeball this by folding the top of the background piece fabric back under the interfacing and then spacing and laying the two pockets on top. I layer the pockets with about 1/4 inch difference in the hight of each one. (See image below)
Steps 3 and 4
Stitched pocket tops layered ready to go
Step 5
Step 5- Stitch the pockets onto the background piece. I only stitch the top inch or two just to make sure the pocket placement doesn't get messed up. The stitch should be far off to the sides, 1/4 inch or less in from the raw edge. You don't want this stitch to show when the wallet is finished. 

Step 6- Your snap tab piece should be ironed lengthwise with the wrong side of the fabric showing. Place a piece of yarn down the middle of the inside with about 1" hanging out the top. The yarn is going to make turning your tab right-side out much easier after you sew it. Go ahead and sew the tab piece together. With the wrong sides showing stitch about 1/4 inch from the edge across the top, backstitch the start and double stitch across the yarn, continue down the length of the tab. 
Step 6

Step 7- With scissors, trim the top corners of the tab. Pull the fabric down over the yarn to turn the snap tab right-side out. Use a chopstick to gently help push out and shape the top corners. Iron the tab flat. Stitch around the tab about 1/8 an inch from the edge. 

Step 8- I like to stay stitch the tab at this point to the front of the Snap side piece. Again, I eyeball this centering it to the middle of the interfacing and about 1" down the lowest/front pocket. (See image below)


Step 8
Step 9
Step 9- Change to your zipper foot. If you have a 4" zip make sure you line the zip up properly to fit the piece. If you are like me and you have a longer zip we are going to just use a section of the middle of the zipper. Sew the top and the bottom parts of the pocket onto the zipper. (See image). 

Step 10- Switch back to your regular foot. Place the other background piece behind the zippered piece face up. Use the zipper as your guide and place the top of the background piece about 1/3 inch above the top edge of the zipper on what will be the top of the pocket. Stay stitch from the zipper about 1" up and 1" down on both sides. Do not stitch through the zipper, this is going to be 4 separate inch long stitches. 

Step 10- Now it is time to stitch the two pieces of our wallet together. With the right sides facing together, use the zipper and the lines of the interfacing to position the pieces together. I position the middle of the zipper about 1 inch from the top of the interfacing. (See image below). In the image you can also see the excess fabric I have for the pocket. That gets trimmed next!

Step 10
Use the middle of the zipper and the top of the
interfacing to line up your pieces. 
Step 11- Pin the pieces together and trim off the excess fabric. Don't forget to make sure your zipper is inside the wallet, you don't want to accidentally cut it off! Use the interfacing as your sewing guide. Stitch 1/8 - 3/16 away from the edge of the interfacing. 

Step 12- Leave most of the bottom edge of the wallet (side furthest from the zipper) open to turn your wallet right-side out. Trim the corners of your wallet to help create nice corners for your wallet. 

Steps 11 & 12
Scrunch the wallet before turning
Use a chopstick to help form corners
Step 13- Turn you wallet right side out. I find that scrunching it up before turning it to "soften" the interfacing makes it easier. Use your chopstick to help push out and form the corners of your wallet. Don't push too hard. You don't want to tear a hole in your fabric or bust the seam.

Step 14- Iron your wallet flat. Tightly fold in the open portion of the wallet using the interfacing as a guide. You can hand stitch the opening closed. I don't bother hand-stitching unless I feel like the ironed folds aren't going to hold well enough, this can happen if you didn't leave enough seam allowance.

Step 15- Top stitch your wallet. This is where I use that 3rd sewing foot. The regular foot will work too. Stitch as close to the edge as possible. I stitch at about 1/8th of an inch from the edge. Stitch on the zipper side of the wallet. You want to stitch all the way around the wallet but you have to backstitch on either side of the zipper and not actually stitch through the zipper. You also have to take care to make sure the snap tab on the other side of the wallet gets stitch down straight.

Step 16- Last but not least you have to install your snap. Center the decorative snap in the center of the bottom of your snap tab. I use a hammer and a wooden spool. Use whatever method you are comfortable with. The other side of the snap goes through the front pocket. I use tailors chalk to mark the positioning of this part of the snap. Check your alignment before committing to the placement!

Snap tab placement
Snap mate placement


Yay, you are done with your perfect little pocket wallet! 

Wednesday, October 6, 2010

My Little Flower Gardern - linked tutorials

My little flower garden
Over the past two three days my mother-in-law and I have been making a dress for me to wear the Turn the Corner Gala I am attending in New York this November. OK, she has been making the dress. Despite the fact I made my wedding dress, I have a little phobia of making clothing. My mother-in-law on the other hand grew up in Holland and learned all about how to be a good wife in school; cooking, sewing, house cleaning, ironing... You should see her mend a sweater!

I have defaulted myself to making the fabric flowers to go on the dress and clutch. (Of course I am making a special bag for the fancy shindig!) My mother-in-law thinks the flowers are the hard part. She can't believe that I can do all these complicated things but I struggle to sew on a button.

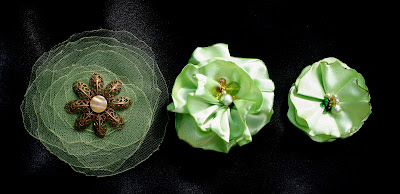
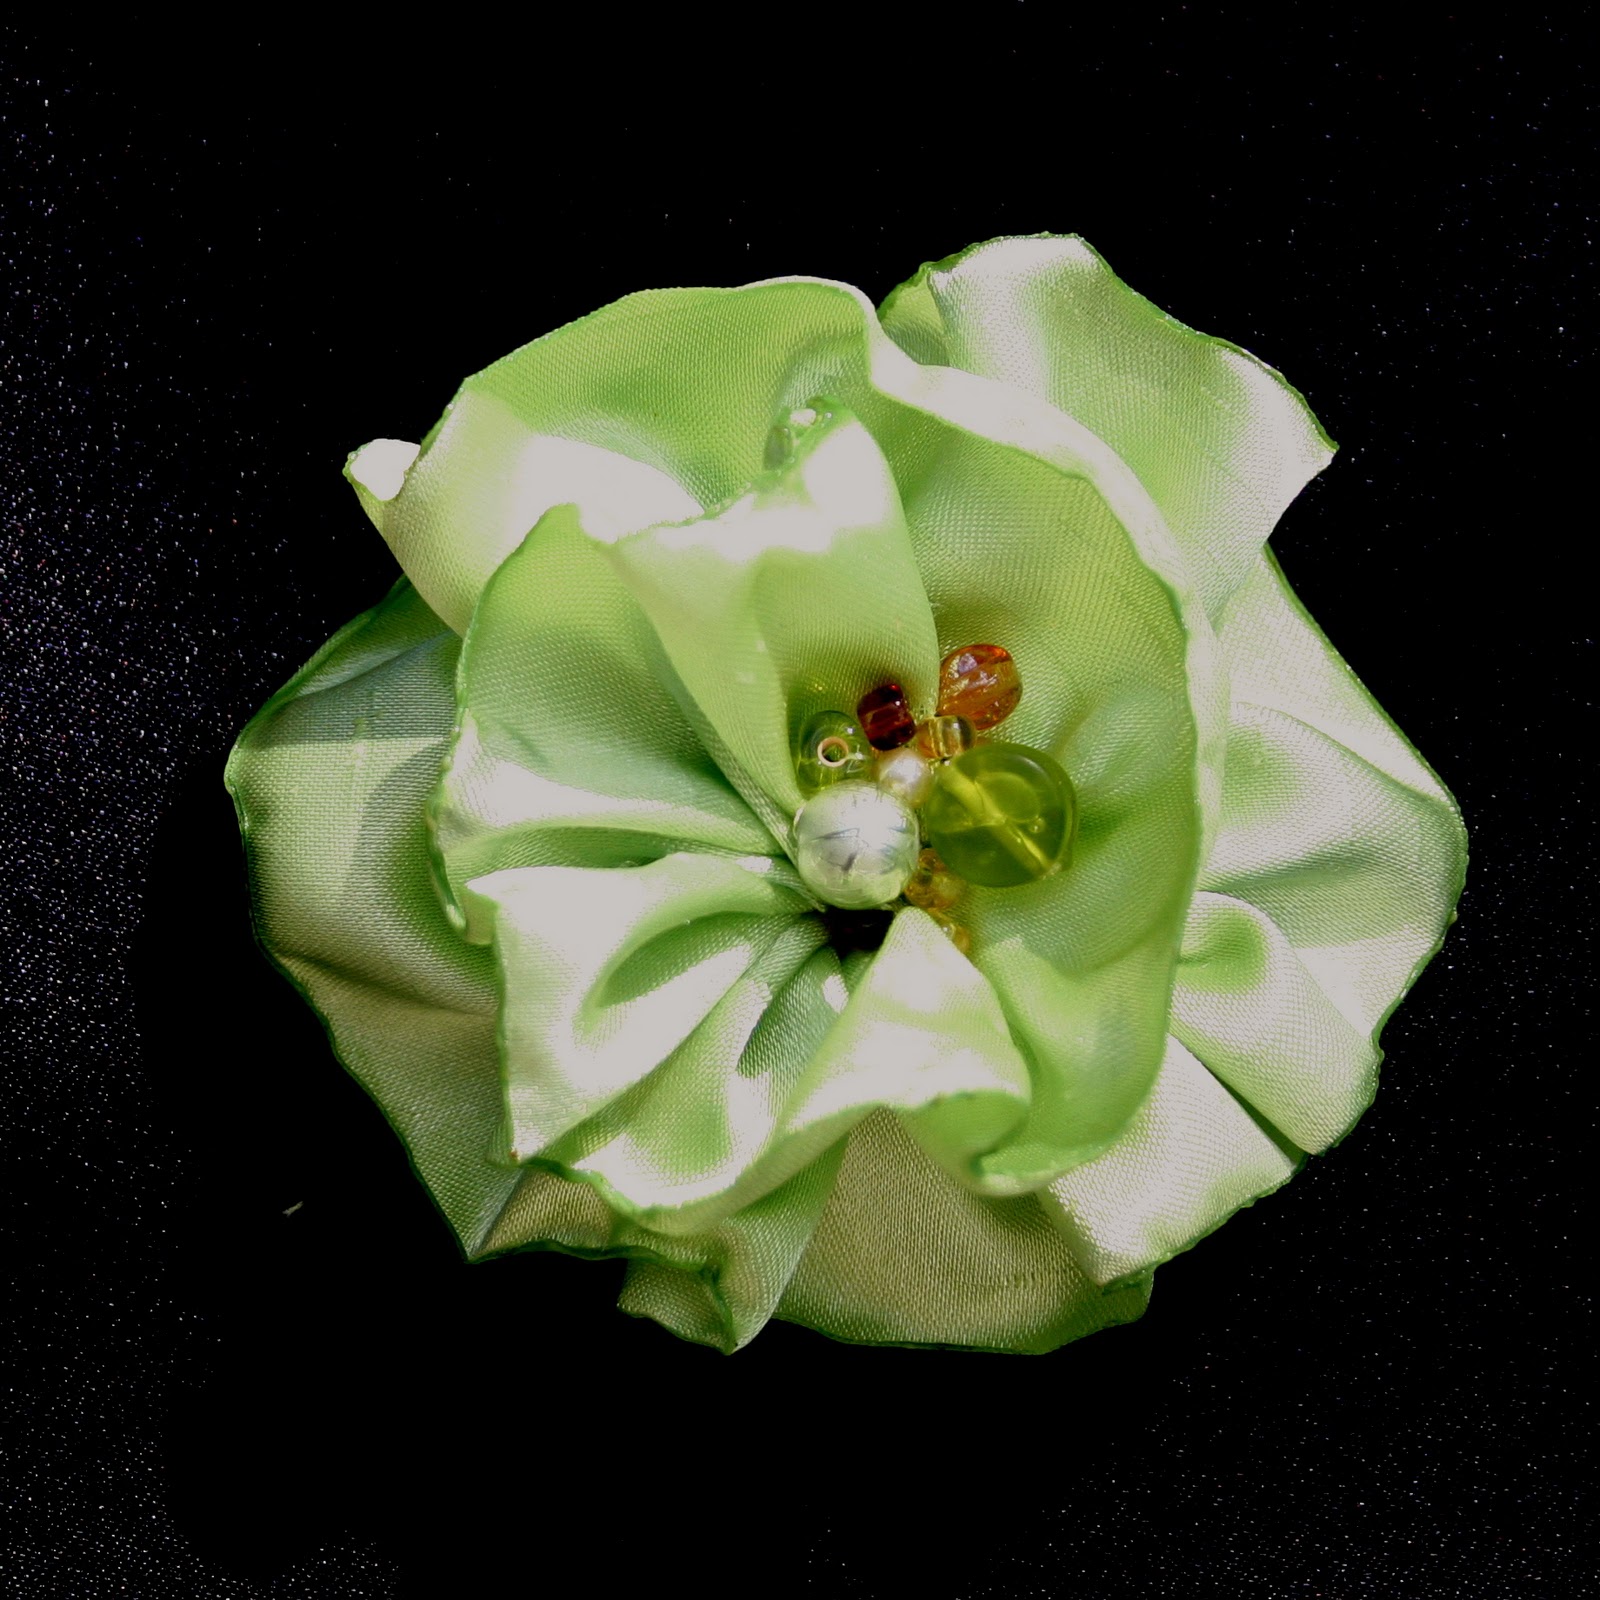
These are the three flowers I have made so far, well the successes anyway. I have included the links to the tutorials I used for inspiration. I don't tend to follow any directions exactly so what I've created and what the tutorial teaches may not be the same. For example I totally dug the burned edges from the Mrs. Priss tutorial so I burned all the edges on my flowers.


Floppy Flower

I sort of followed this tutorial from Wise Craft Fall 2010. I didn't actually print out the templates or assemble it at all in the same way... I guess the only thing I did the same was fold the "petals" in half.
http://blairpeter.typepad.com/weblog/2006/03/fabric_flowers.html


Delicate Flower

I loved the flowers on the Mrs Priss Anthropologie Bonheur Necklace! I might need to buy the right fabric and actually try the necklace next.
http://mrspriss.com/2010/01/12/anthropologie-bonheur-necklace-tutorial/


Ribbon Flower 

This is a pretty typical and easy to make flower. It turned out great! I think this will be the flower I put on the belt of my dress!
http://sewing.craftgossip.com/tutorial-frayed-fabric-flower-brooch/2009/03/17/


To find flower tutorial, there are a ton of them, I browse through Google images for How to Make Fabric Flowers. When I see something I like I click and then follow the link to the actual website/blog with the tutorial. Not all the images end up linking to tutorials but a large percentage of them do.

Tuesday, August 17, 2010

Duct Tape Me and Body Form Tutorial

I have a fancy Gala to go to in November. I've been dreaming of making the perfect dress for the event. It is so hard to fit a dress when it is on you and my husband is no help in this department; I would love one of those fancy adjustable dress forms, but I'm broke and they are EXPENSIVE! I decided to settle for making my own duct tape dress form.

I did enlist my husband for this adventure. Duct taping your wife is probably high on every mans list of must dos, I'm just not sure this is exactly what they have in mind.

All Taped Up

Before I started this project I searched YouTube for tutorials. I didn't really find any good ones. I found quite a few that didn't explain anything. Here is the link to the best of them, once you get past the ridiculous giggling it's actually alright- http://www.youtube.com/watch?v=jT-7D6oK9XM

I decided to do a written tutorial, I'm not ready for exposing myself like this on video just yet!

What You Need-
  • 1 large roll of duct tape (60 yards) 
  • scissors
  • sleeved shirt you don't mind never seeing again
  • 5-6 strips scrap fabric about 3 inches wide and 5+ inches long
  • lots of newspaper, plastic bags or poly-fil
  • broom stick without the broom (found at hardware stores for about $4)
  • optional- boyshort style undies that you don't mind never seeing again (if you want your body form to have legs)
I chose to give my body form legs in case I want to make pants one day and I stuffed it with newspapers because they are free and abundant. Some people stick a hanger in them and hang them, I wanted mine to be able to stand, the broom stick was a perfect solution.

How To-
Get yourself outfitted! Don’t worry about a bra, you will create the support with the duct tape. Make sure that you cover every part of your body that is going to be taped. You don’t want any exposed gaps, it will hurt when the tape comes off. If your shirt or boy shorts are not long enough, wrap a piece of scrap fabric around the bottoms. Tape them in place. Don’t worry about your neck yet, when you get to it that is what the other scraps of fabric are for.

Be sure to cover enough of your body; you need to make sure you cover to below your hips to have a fully functional dress form.

1. Start by wrapping a piece of duct tape around your chest right under your breasts. This should be snug but not terribly uncomfortable. Now form the rest of your duct tape support. At this point it will look like the outline of a bra or string bikini with your boobs sticking out through the triangles (see illustration).

2. Wrap a piece of tape all the way around your waist.

3. If you are making a form with legs, wrap pieces of tape around your inner thigh. These pieces need to create the support that will give the definition of your butt. If your form is not going to have legs wrap a single piece around both legs at the same spot.


4. The form of your breasts and butt is the most important, start at the support tape under each area and lay strips from the bottom to the top of the area.

5. From here it is just a matter of wrapping every little part of you. There really isn’t a wrong way to do it. Follow the definition of your body closely and make sure that the tape is firm but not crushing you.

6. The neck is a little trickier than the rest of the body. Don’t forget to cover your skin with the scraps of fabric. Use smaller pieces of tape to make the wrapping of this area easier.

7. Get Me Out Of Here! By this time I’m pretty sure this is what you will be thinking. Carefully, starting in the neck of the the back, your friend will cut straight from top to bottom and release you from your sweaty body suit. If you are making a dress style form, you will cut literally from the top to the bottom. If your form has legs cut down to the plumpest part of your bum. Getting out of a duct tape form with legs can be challenging, my husband enjoyed this part.

8. When you are ready to continue, tape the cut seam back together with duct tape.

9. Now you are ready to stuff yourself! What ever you have chosen to stuff with be sure to stuff well and firmly. Pay attention to the breasts and butt, make sure not to leave any gaps. Insert your broom stick, try to keep it centered by packing stuffing around it.

10. Tape the neck, armholes and legs/bottom shut. Do each individually, stuffing as much into each area as necessary and using tape to keep it in.

Stand her up and there you go!


Gave her some SEXY undies!
Dressed and Ready!

Monday, August 9, 2010

Posting Great Pics -- Tutorial Part 3, Photo Editing

This is part three of my three part tutorial on how to make better photos to post on your blog. Make sure to check out all the Posting Great Pics posts.

Posting Great Pics -- Tutorial Part 1, Background and Setting
Posting Great Pics -- Tutorial Part 2, Lighting

Taking good pictures is only half the battle. It isn't often that you are going to snap a great shot that needs no editing at all. Photo Editing isn't cheating and it doesn't mean that you don't take good photos. It is just part of the process. You are trying to recreate how it looked through your eyes, or to create what you want your viewer to see. It's an enhanced experience, like HDTV is way better than... whatever it's called when it isn't HD.

Photo Editing is more than just cropping, resizing and adjusting the color of an image. You have the ability to create a mood with your photos, an atmosphere for your blog. Think about the atmosphere of dining at McDonalds verses a nice restaurant. Big difference, I know where I'd rather be spending time.

Most the photos on my blog have a feel like the one posted below. There are a couple of reasons for this. First, I like it. Second, I am trying to create something that actually looks good given the blog template I am using. Notice that nice white border around my photos? Contrary to want you might think, I don't love vignette.

Here on Upcycled by Ash, in combination with that boarder, I like it. I also like to over-saturate my images. I don't do this with all my photos everywhere, just here. I want my blog to have cohesion, so I make the photos all look like they belong together by sticking with a combination of one or more of the following vignette, saturation, and edge blur. I also crop my photos and adjust the lightness/darkness. These are all simple techniques.

Original
Vignette and Saturate


Most computers come with some kind of photo editing program, so do most cameras. These programs are usually more than enough to make simple adjustments to your photos. I have Photoshop, and I know how to use it. I don't though, not for my general blog pictures. My computer came with iPhoto. I hate the program in general, but it is so easy to quickly adjust my images with it that I don't bother opening Photoshop.

Here is the progression I followed for this photo of my Camo Bag. These are the same steps I take for the majority of the photos on this blog-

Original

Saturate
Edge Blur
Vignette
I also like to antique photos. This doesn't work for just anything but when it does work it can look really nice. If you want to make a photos look "old" this is the simplest most basic option.

Original
Saturate, Vignette
Antique

Matte-
This works best if your blog post background is white. Mine isn't so instead of blending into the post it is in this ugly square.

Matte

Fade Color-
I don't use this technique on Upcycled by Ash but I've used it a lot for scrapbooking. I don't actually scrapbook but I once made a journal of my life with my husband and our travels. I literally made it, book and all. It turned out great. Fading the color of the photos made it look like the journal that we'd carried with us and filled while we were traveling. I wanted it to look old and used. (click photo to see image larger)

Faded Photos Create Effect


Online Editing Programs-
There are quite a few of these sites that will let you do funky stuff to your photos. BeFunky.com is a free site that has some basic editing options if you don't have a program on your computer.


28 Online Photo Editing Websites- http://www.1stwebdesigner.com/resources/28-online-photo-editing-websites-to-have-fun-with/

There are a million things you can do to your photos if you want to take the time. Photoshop is an amazing program! For the most part a few simple adjustments like the ones I have shared with you here are all you need for your blog photos. 

Cool tutorials on YouTube, they are for photoshop and are pretty advanced- http://www.youtube.com/watch?v=SHGElJ4L_DQ&feature=related

Yes, it requires time to take and create good photos, but it's worth it. Cool things come from having great photos on your blog. I posted the photo below in a post about Udi's Gluten Free Foods a few weeks ago. I tweeted the post and someone from Udi's saw it. They loved the photo and asked if they could post it on the Udi's facebook page. I said yes, and when the girl wrote back to say thanks, she also asked if I wanted to do a review on more Udi's products. Udi's sent me their whole line of muffins and cinnamon rolls to try! Supper yummy and all because of the photo!

My Favorite Udi's Gluten Free Bagels!


Posting Great Pics -- Tutorial Part 2, Lighting

Sunday, August 8, 2010

Posting Great Pics -- Tutorial Part 2, Lighting

This is part two of my three part tutorial on how to make better photos to post on your blog. Make sure to check out all the Posting Great Pics posts.

Posting Great Pics -- Tutorial Part 1, Background and Setting
Posting Great Pics -- Tutorial Part 3, Photo Editing

Today's topic is The Importance of Good Lighting

Lighting is important. It really is true that you can take better photos in the morning and evening because of the lower angle of the sun. There are little ways to cheat this though.

A few days ago when my husband and I took the photos for the Mini Hoot Messenger Tote, we got out a little later than ideal for the lighting. No big deal, we just looked around for good light and made it work.

Full Light
Make it Work
Find the Light
  
click on the photos to see them larger

You can see that in the first photo, Full Light, everything we want to focus on is totally washed out. When things are washed out this bad, even photo editing can't make it beautiful.

We look throughout the yard to find some soft light. In the second photo, Find the Light, You can see the different types of light. In the very front of the photo the light is bright and harsh, not good for photos. In the middle you can see that the green plans look soft and warm. That is the light we are looking for! 

That soft warm light isn't always easy. You need to find a spot big enough for the item you are photographing. Hard dark shadows will ruin your shot. 

In the third photo, Make it Work, you can see that I found a patch of light that would work for the bag. I had to position my body a little awkwardly and I hitched the bag up higher than I would actually wear it; to make the shot work. Because the bag is the focus of the photos, it doesn't matter that I am mostly in the shadows. 
Before Photo Editing

After Photo Editing

We found a patch of good light for my favorite Mini Hoot shot. I didn't even have to contort my body too much. Look at the before shot, it might look a little dark but it is in full, soft light. Compare the light in this shot to the light in the Full Light photo we looked at above.

Lighting is only part of creating great photos for your blog. A few quick photo edits and the Mini Hoot really pops right out of the photo.

Make sure you take LOTS of photos in all kinds of light of each item you are photographing. I take at least 20 shots of each item I photograph for this blog. I will be lucky to find any that I think are awesome right off the bat. I generally find 2-4 that I see have the potential with a bit of editing to be good enough to post.

So far on Upcycled by Ash I have taken all my photos outside. The same tips work inside as well, it's harder to fake good lighting though. Harder but not impossible.  Luckily many other people have already written that post. Follow this link to a good overview- http://www.essortment.com/hobbies/photographyligh_suff.htm


Posting Great Pics -- Tutorial Part 1, Background and Setting
Posting Great Pics -- Tutorial Part 3, Photo Editing

    Saturday, August 7, 2010

    Posting Great Pics -- Tutorial Part 1, Background and Setting


    Before
    After

    I called this post Posting Great Pics instead of Taking Great Pics on purpose. Unless what you are selling is your photography, it is pretty easy to turn a mediocre photo into a great one to post on your blog.

    You can see in the photo above that my original was nothing special to look at. It is a little bit washed out, the colors aren't great and the focal point isn't really the bag. After a few really quick alterations; the photo is more visually appealing and your eye is drawn to the bird on the bag where it is supposed to be. For the Birds Messenger Tote

    I get comments all the time from people telling me how great my photos are and asking me if I could give some tips on how to take better photos. I decided that I should do a tutorial and give away all my secrets.

    The most important elements- I have divided the tutorial into three parts and will post it over the next three days.
    1. Background and Setting- The background is part of your story. If you have an ugly background you are going to have a hard time making your items look good. A photo of an item alone is BORING without a set up. A white wall? They stage photos in magazines for a reason.
    2. Lighting- Lighting is important. It really is true that you can take better photos in the morning and evening because of the low angle of the sun. There are little ways to cheat this though.
    3. Photo Editing Program- Even professional photographers touch-up their photos. 
    Your camera isn't overly important. Since we are talking about posting to the internet, resolution isn't really an issue. Most problems can be fixed in your photo editing program. Most cameras today have a myriad of settings to help you take better photos. Honestly, most of the time "auto" will work just fine. I don't use any fancy lighting equipment either, my photos are all powered by natural light.

    Background and Setting 
    I posted the photo below left to twitpic right after I finished my For the Birds Messenger Tote. It was late and I was excited, I wanted to share it with the world. The photo isn't bad, the bag actually looks pretty good, but it doesn't look professional at all. I want to sell the things I make and I want people to know that this is what I do, I'm good at it and I take it seriously.


    Posted to Twitpic
    Pro Shot
    To me the background and the setting of shots is super important. I will wait as long as it takes for my husband to have the time to help me do a photoshoot for a new item rather than post a picture that doesn't meet my standards.
    Cutest Puppy Ever

    That doesn't mean that I never post a bad pic. I posted a pretty bad one of my dog wearing some pants I made. The difference is, I'm not selling those pants. I posted that because it was funny and cute! When your photos are the focus of what you are posting, they are too important to not do the job right.

    If all my photos looked like the photo I posted to twitpic no one would ask me about my photos, less people would be interested in the items I make, and my blog stats would drop significantly.

    What makes a great background is going to be different for everyone and to some extent be determined by your subject. My bags and wallets would work in an urban setting, but I love the outdoors and the lighting of natural settings. Your personality and the atmosphere you are trying to achieve for your blog should determine the background and setting of your shots.

    For some people a plain black background achieves the look they are after. It works for them, not for me. Lighting and equipment play a bigger part when you are trying to get that professional black background look.

    Setting is more than just the background though. Photographing your items being used in the way they are intended is much more compelling.

    Beige Bag
    Red Flower Tote
    RW&B Wallet

    What your model wears is important too. I am the "model" for all my photos, I make sure to wear something that looks good with each individual item. If I am taking photos of five different items, I will wear five different outfits if I need to. At first I felt really self conscious as the "model" for my items, especially since we have been known to parade through the neighborhood looking for good light. My neighbors might think I'm conceited, or maybe they think they live next door to an actual model, wouldn't that be funny! The reality is, if you look through my photos here, I'm not really in them. I'm just part of the background.

    If your item is earrings, make sure to do your hair up. If you are selling stuffed animals or dolls, put them on a bed or in a child's arms. Food goes on a nice plate with all the drips and crumbs cleaned up, make a fake table setting or show in-progress steps.

    Banana Chocolate Crepes
    Gluten Free Banana Chocolate Crepes
    These crepes look good! I used to post my recipes on another blog, this was one of my faves. I plated this one special for the photos making sure to drizzle the honey and sprinkle the chocolate exactly where I wanted it.

    My friend Kim has some fantastic photos on her food blog, Affairs of Living. Claire Ogden does a great job making her jewelery pop with a simple wood background, Claire Ogden Designs.

    Your photos more than your words will entice people into your blog. A good photo can inspire someone to read a post, or to ignore a post. Words are words, they don't look interesting in themselves. How you write might keep someone reading, but first you have to get them to stop and have a look at what it is you are writing about.


    Nice, but blurry
    Boring and bad lighting
    My Style
    There is no right or wrong for background and setting, but there is ugly and boring.

    This is part one of my three part tutorial on how to make better photos to post on your blog. Make sure to check out all the Posting Great Pics posts.

    Posting Great Pics -- Tutorial Part 2, Lighting
    Posting Great Pics -- Tutorial Part 3, Photo Editing

    Related Posts Plugin for WordPress, Blogger...